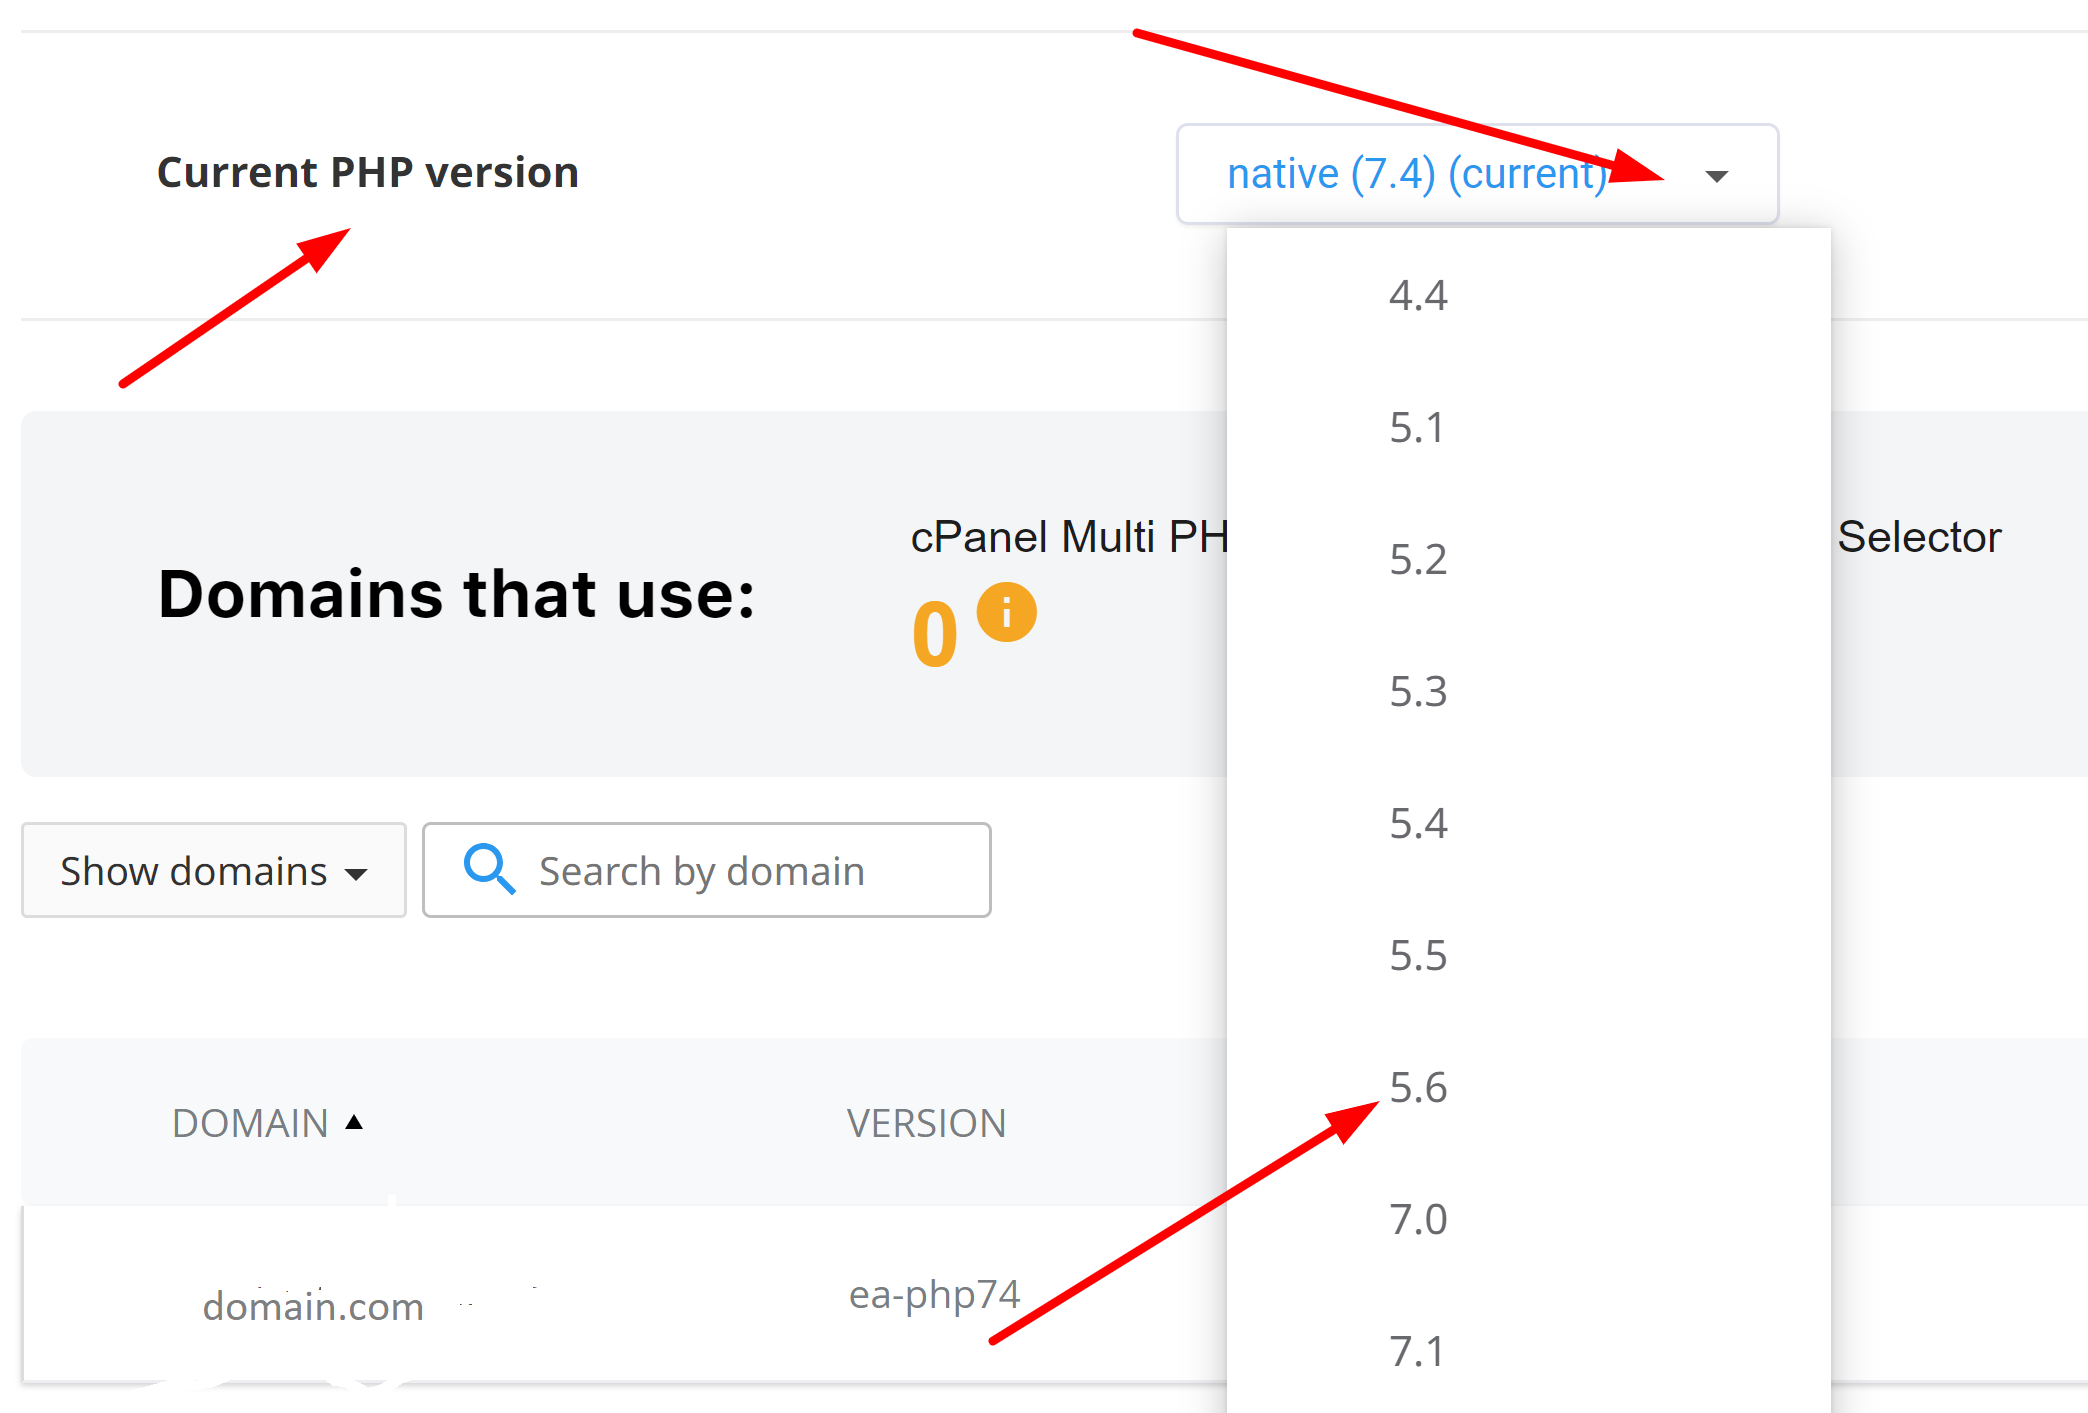
You can utilize CloudLinux's PHP Selector tool to easily modify the PHP version for your website within cPanel, allowing you to choose the desired PHP version for your website.
CloudLinux provides various PHP Versions to choose from.
Step 1 : Log into your cPanel account.
Step 2 : In the Software section, click the Select PHP Version.

Step 3 : On the right side of Current PHP version, click on the drop-down menu and choose the version you wish to use.

Step 4: Click Apply.

when you set the PHP version with above method then that version is used for the entire account. However, if you want to change the PHP version for a specific domain or subdomain, follow these steps:
Step 1: Using your preferred text editor, create a file named .htaccess in the directory where you want to use a different PHP version.
Step 2: Copy the following text :
<FilesMatch ".(php4|php5|php3|php2|php|phtml)$">
    SetHandler application/x-httpd-alt-phpXX___lsphp
</FilesMatch>
Step 3: Replace XX with the PHP version you want to use in the directory. You can use any PHP version that is listed in the cPanel PHP Selector. For example, to enable PHP 8.1, you would type SetHandler application/x-httpd-alt-php81___lsphp. (Make sure you do not include the period in the version number. For example, for PHP version 7.4, type 74.
Step 4: Paste the modified text into the .htaccess file.
Step 5: Save the .htaccess file. The new PHP version takes effect immediately.
To verify the new configuration, create a PHP file that runs the phpinfo() function. Load the file in your web browser, and confirm the PHP version. For example:

If you enabled additional PHP extensions for the default PHP version in cPanel, check the output from the phpinfo() function and confirm that the extensions have also been loaded for the custom PHP version in the directory. If the extensions have not been loaded, please open a support ticket on the Customer Portal at https://portal.hostnext.net and we will resolve the issue for you.

